Installing the Thomson TG123g Wireless Adapter - Windows Vista
Here we'll show you how to install the Thomson TG123g Wireless Adapter on Windows Vista.
- Introduction
- Before you start
- Installing and connecting the TG123g
- Connecting to your Wireless Network
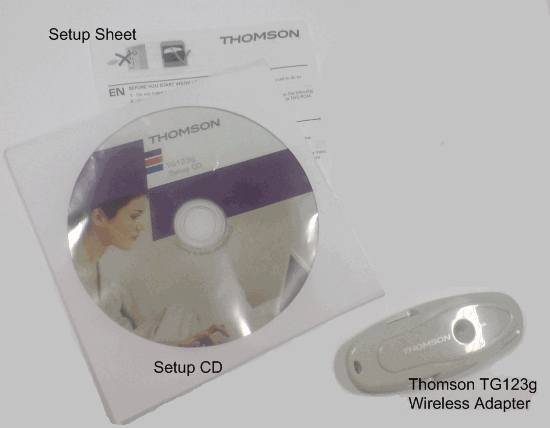
Introduction
Your hardware pack contains:
Before you start
Only plug your adapter in when the installation software tells you to.
Installing and connecting the TG123g
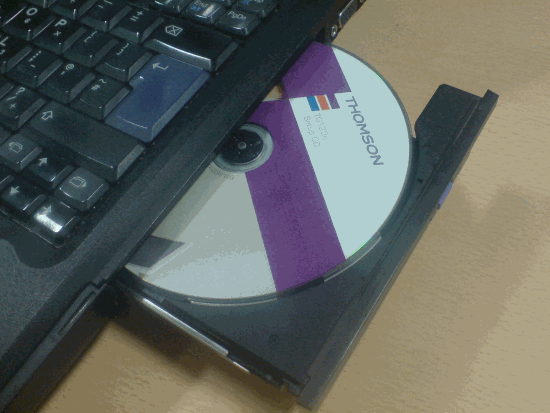
1. Put the TG123g Setup CD into your CD drive,
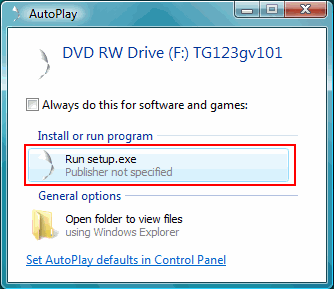
2. An AutoPlay window will appear on your screen.
Click Run setup.exe to begin setup. At this point you might see another pop-up asking you to confirm that you want to run the software. Click Allow to continue.
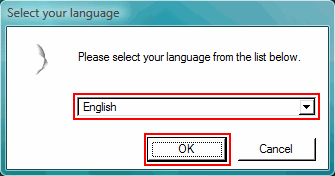
2. Choose your language and click OK.
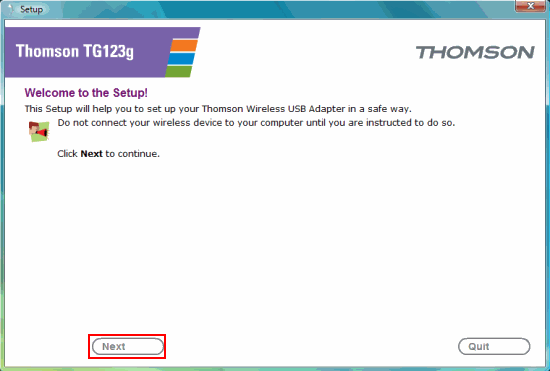
3. You'll see the setup Welcome Screen, click Next.
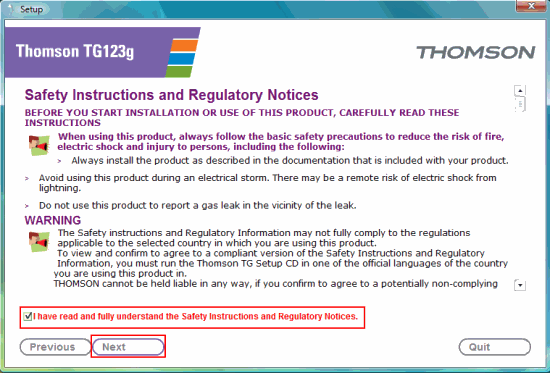
4. You'll be asked to check that everything you need is in the box, click Next. Now you'll see the Safety Instructions and Regulatory Notices. When you've read these and you're happy with them, tick the box labelled I have read and fully understand the Safety Instructions and Regulatory Notices and press Next.
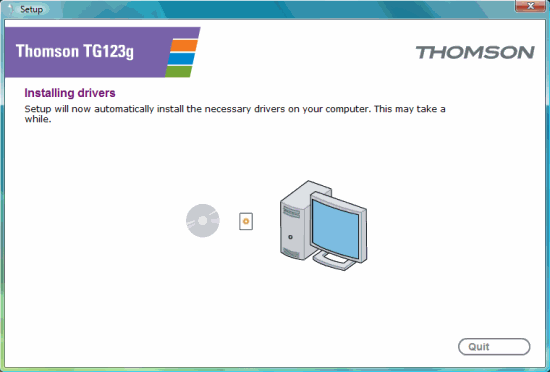
5. The software for your Thomson TG123g Wireless Adapter will now be installed.
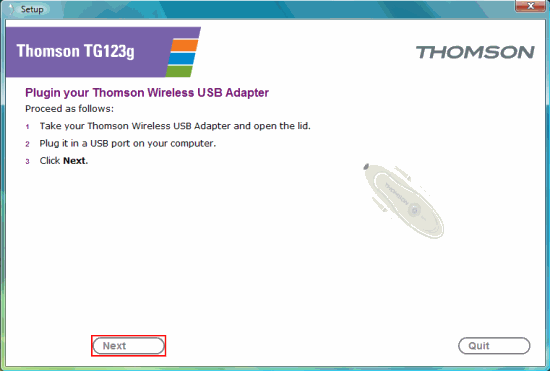
6. Now it's time to plug in the adapter. Open the lid and plug the adapter into a USB port on your computer and click Next.
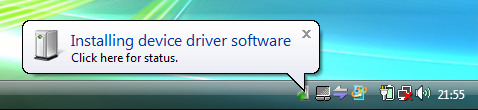
7. You'll see a pop up at the bottom of your screen, this means that your computer has detected the adapter.
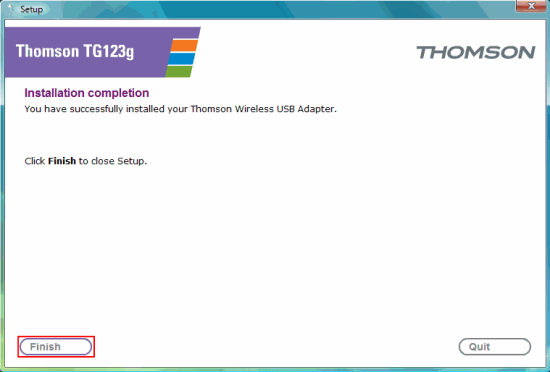
8. When it's finished you'll see this screen, press Finish to close the setup wizard
Connecting to your wireless network
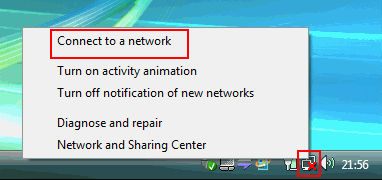
1. Now the adapter is installed, you'll see a wireless network icon in your system tray (you can find this in the bottom right-hand corner of your screen). Right click on it and choose Connect to a Network.
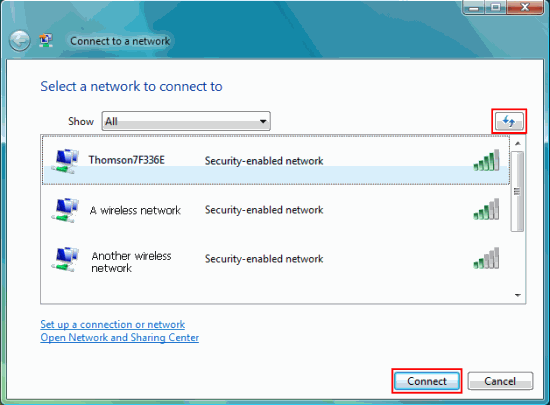
2. Your computer will scan and show you the networks you can connect to, if you don't see anything click the refresh button.
Click on your network so it's highlighted and press Connect. On the Thomson 585v7 router, the name of the wireless network is the SSID which you'll find printed on the bottom of the router.
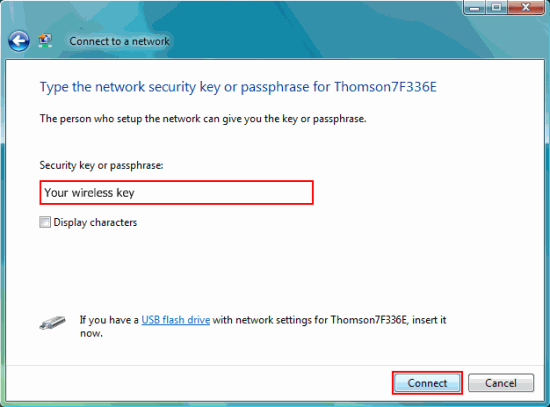
3. If you're connecting to your Thomson 585v7 for the first time, enter the WPA PSK key (printed on the bottom of the router) in the Security key or passphrase box and press Connect.
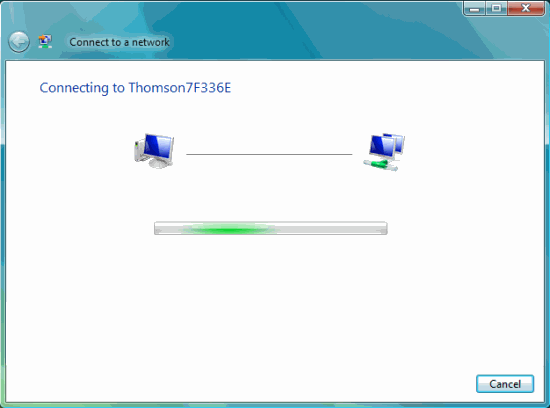
4. Your computer will now connect to the network.
If you've not already done so the next step is to connect your router to the Internet.
If you're using the Thomson 585v7 our Installation guide will show you how.
Has this page helped you solve your problem? Your feedback helps us to improve the help we provide.
Rate this page : 


Please note: We cannot reply to individual feedback through Rate My Page. If you need more help with a problem please use Contact Us.


